|
How to Remove Orange Car Wraps Safely | Nascarwraps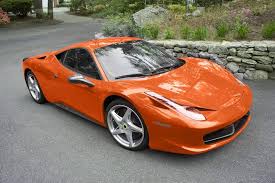 Safely Removing Orange Car Wraps: A Step-by-Step GuideCar wraps are a popular choice for those looking to customize their vehicles without committing to a permanent paint job. Among the variety of colors available, orange wraps can make a bold statement on the road. However, there may come a time when you want to remove the wrap, whether to change the color, sell the car, or simply return to the original paint. Here's a comprehensive guide on how to safely remove Orange Car Wraps. Step 1: Gather Your Tools Before you begin, it's essential to have the right tools on hand. You'll need a heat gun or hair dryer, a plastic scraper or squeegee, adhesive remover, microfiber cloths, and a spray bottle filled with soapy water. These tools will help ensure a smooth and damage-free removal process. Step 2: Clean the Surface Start by washing your car thoroughly to remove any dirt or debris. A clean surface will make it easier to lift the wrap without scratching the paint underneath. Use a mild car soap and rinse with water, then dry with a microfiber cloth. Step 3: Apply Heat Using a heat gun or hair dryer, gently warm the section of the wrap you plan to remove first. Keep the heat source moving to avoid overheating any area, which could damage the paint. The heat helps soften the adhesive, making it easier to peel off the wrap. Step 4: Begin Peeling Once the wrap is warm, use your fingers or a plastic scraper to lift an edge. Slowly peel back the wrap at a 45-degree angle. Pulling at this angle helps minimize stress on the material and reduces the risk of tearing. Work in small sections and continue applying heat as needed. Step 5: Remove Adhesive Residue After the wrap is removed, you'll likely find some adhesive residue left on the car's surface. Use an adhesive remover to tackle these stubborn spots. Apply it according to the manufacturer's instructions, then wipe away with a microfiber cloth. Be gentle to avoid scratching the paint. Step 6: Final Wash Give your car another wash to remove any remaining adhesive remover and ensure a clean finish. This step also allows you to inspect for any damage that may have occurred during removal. Step 7: Protect the Paint To maintain the integrity of your car's paint, consider applying a wax or sealant. This will protect against environmental elements and keep your vehicle looking pristine. Removing an orange car wrap doesn't have to be daunting if approached methodically. With patience and the right tools, you can safely return your vehicle to its original state or prepare it for a new look. Remember, if you're unsure or uncomfortable with any step of this process, consulting a professional is always a wise option. This ensures that both your car's appearance and value are preserved.(Metallic Vinyl Wraps) |